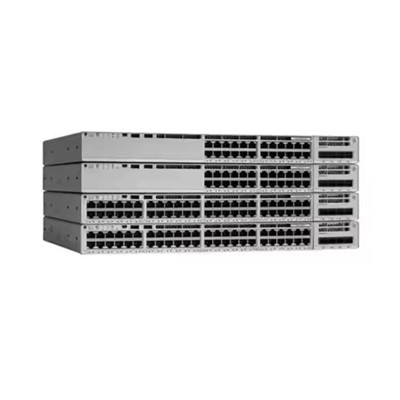


As a trusted Cisco switch supplier, I'm often asked about the configuration of a voice VLAN on a Cisco switch. This process is crucial for businesses that want to integrate Voice over IP (VoIP) technology into their network infrastructure. In this blog post, I'll guide you through the steps to configure a voice VLAN on a Cisco switch, ensuring that your network can handle voice traffic efficiently and effectively.
Understanding Voice VLANs
Before diving into the configuration process, it's important to understand what a voice VLAN is and why it's necessary. A voice VLAN is a separate virtual LAN dedicated to carrying voice traffic. By isolating voice traffic from data traffic, you can improve the quality of your voice calls by reducing latency, jitter, and packet loss. This separation also allows for better management and security of your network.
Prerequisites
To configure a voice VLAN on a Cisco switch, you'll need the following:
- A Cisco switch, such as the Switch Cisco C2960, Switch Cisco C1000 24t 4g L, or Switch Cisco Catalyst 9300.
- Access to the switch's command-line interface (CLI) via Telnet, SSH, or a console cable.
- Basic knowledge of Cisco IOS commands.
Step 1: Create a Voice VLAN
The first step is to create a new VLAN for your voice traffic. You can do this by entering the following commands in the switch's CLI:
enable
configure terminal
vlan <voice_vlan_id>
name <voice_vlan_name>
exit
Replace <voice_vlan_id> with the VLAN ID you want to use for your voice traffic (e.g., 100), and <voice_vlan_name> with a descriptive name for your voice VLAN (e.g., Voice_VLAN).
Step 2: Configure the Interface for Voice Traffic
Next, you need to configure the interface that will be connected to the IP phone to support voice traffic. You can do this by entering the following commands:
interface <interface_name>
switchport mode access
switchport access vlan <data_vlan_id>
switchport voice vlan <voice_vlan_id>
spanning-tree portfast
exit
Replace <interface_name> with the name of the interface (e.g., GigabitEthernet0/1), <data_vlan_id> with the VLAN ID of the data VLAN (e.g., 10), and <voice_vlan_id> with the VLAN ID of the voice VLAN you created in Step 1.
The switchport mode access command sets the interface to access mode, which means it will be connected to a single VLAN. The switchport access vlan command assigns the interface to the data VLAN, while the switchport voice vlan command assigns the interface to the voice VLAN. The spanning-tree portfast command enables PortFast on the interface, which reduces the time it takes for the interface to transition from the blocking state to the forwarding state.
Step 3: Configure the IP Phone
Once you've configured the switch interface, you need to configure the IP phone to use the voice VLAN. This process may vary depending on the make and model of your IP phone, but generally, you'll need to do the following:
- Log in to the IP phone's web interface using a web browser.
- Navigate to the VLAN settings page.
- Set the VLAN ID to the same ID as the voice VLAN you created in Step 1.
- Save the settings and restart the IP phone.
Step 4: Verify the Configuration
After configuring the switch and the IP phone, you need to verify that the voice VLAN is working correctly. You can do this by entering the following commands in the switch's CLI:
show vlan brief
show interfaces <interface_name> switchport
The show vlan brief command displays a list of all the VLANs on the switch, including the voice VLAN you created. The show interfaces <interface_name> switchport command displays the configuration of the interface, including the data and voice VLANs.
You can also test the voice VLAN by making a test call from the IP phone. If the call goes through without any issues, then the voice VLAN is working correctly.
Step 5: Configure Quality of Service (QoS)
To ensure the best possible quality of your voice calls, you should configure Quality of Service (QoS) on the switch. QoS allows you to prioritize voice traffic over data traffic, reducing latency and jitter. You can do this by entering the following commands in the switch's CLI:
mls qos
class-map match-any VOICE
match ip dscp ef
exit
policy-map VOICE-POLICY
class VOICE
set cos 5
set dscp ef
exit
exit
interface <interface_name>
service-policy input VOICE-POLICY
exit
The mls qos command enables QoS on the switch. The class-map command creates a class map that matches voice traffic based on the Differentiated Services Code Point (DSCP) value of 46 (EF). The policy-map command creates a policy map that sets the Class of Service (CoS) value to 5 and the DSCP value to 46 for voice traffic. The service-policy input command applies the policy map to the interface.
Step 6: Configure the Voice Gateway
If you're using a voice gateway to connect your IP phones to the public switched telephone network (PSTN), you need to configure the voice gateway to support the voice VLAN. This process may vary depending on the make and model of your voice gateway, but generally, you'll need to do the following:
- Log in to the voice gateway's CLI using Telnet or SSH.
- Configure the interface that will be connected to the switch to support the voice VLAN.
- Configure the voice gateway to use the same voice VLAN ID as the switch.
- Save the settings and restart the voice gateway.
Step 7: Monitor and Troubleshoot
Once you've configured the voice VLAN, you should monitor the network to ensure that the voice traffic is flowing smoothly. You can use tools such as SNMP, NetFlow, and Syslog to monitor the network and detect any issues. If you encounter any issues, you can use the following commands to troubleshoot:
show interfaces <interface_name> counters
show interfaces <interface_name> status
show interfaces <interface_name> errors
The show interfaces <interface_name> counters command displays the number of packets sent and received on the interface, as well as the number of errors. The show interfaces <interface_name> status command displays the status of the interface, including whether it's up or down. The show interfaces <interface_name> errors command displays the number of errors that have occurred on the interface.
Conclusion
Configuring a voice VLAN on a Cisco switch is a relatively straightforward process that can significantly improve the quality of your voice calls. By following the steps outlined in this blog post, you can ensure that your network can handle voice traffic efficiently and effectively. If you have any questions or need further assistance, please don't hesitate to contact us to discuss your procurement needs. We're here to help you get the most out of your Cisco switches and ensure that your network is running smoothly.


References
- Cisco Systems, Inc. (2023). Cisco IOS Switching Command Reference.
- Cisco Systems, Inc. (2023). Configuring Voice VLANs on Cisco Switches.
- IP Phone Manufacturer. (2023). IP Phone User Manual.