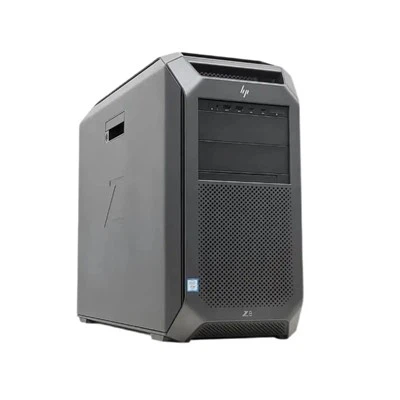


As an HP server supplier, I often encounter customers who are looking to upgrade the memory of their HP servers to enhance performance and meet the growing demands of their businesses. In this blog post, I'll guide you through the process of upgrading the memory of an HP server, covering everything from understanding your server's requirements to the actual installation process.
Understanding Your HP Server's Memory Requirements
Before you start the memory upgrade process, it's crucial to understand your HP server's memory requirements. Different HP server models have different memory capacities, supported memory types, and memory slot configurations. Here are some popular HP server models and their memory details:
- HPE Proliant DL380 Gen10 Plus 8sff: This powerful server supports up to 12TB of DDR4 memory. It has 24 DIMM slots across two processors, allowing for flexible memory configurations.
- HP Proliant DL580 G10: A high - end server, the DL580 G10 can support up to 12TB of memory. It features 48 DIMM slots, which are spread across four processors, providing extensive memory expansion capabilities.
- Proliant DL360 Gen10 8sff: This compact yet efficient server supports up to 6TB of DDR4 memory. It has 12 DIMM slots, which is suitable for small to medium - sized businesses.
To find out the exact memory requirements for your specific server model, you can refer to the server's user manual or the official HP documentation. You can also use HP's Server Memory Configurator tool, which helps you determine the compatible memory modules based on your server's configuration.
Choosing the Right Memory Modules
Once you know your server's memory requirements, the next step is to choose the right memory modules. Here are some factors to consider:
Memory Type
HP servers typically support DDR4 memory modules. Make sure to choose modules that are compatible with your server's motherboard and processor. DDR4 memory offers higher speeds and lower power consumption compared to its predecessors.
Memory Capacity
Decide how much additional memory you need based on your business requirements. If your server is running memory - intensive applications such as virtualization or databases, you may need to add a significant amount of memory. It's also a good idea to plan for future growth and add more memory than you currently need.
Memory Speed
The speed of the memory module is measured in MHz. Higher - speed memory can improve the overall performance of your server. However, your server's motherboard and processor must support the chosen memory speed. Check the server's documentation to find out the maximum supported memory speed.
ECC (Error - Correcting Code)
ECC memory is highly recommended for servers as it can detect and correct single - bit errors, which helps prevent data corruption. Most HP servers support ECC memory, and it's a crucial feature for ensuring the reliability of your server.
Brand and Compatibility
It's advisable to choose memory modules from reputable brands that are known for their quality and compatibility with HP servers. HP - branded memory modules are guaranteed to be fully compatible, but there are also third - party manufacturers that produce high - quality, compatible memory modules at a lower cost.
Preparing for the Memory Upgrade
Before you start the physical installation of the memory modules, there are a few preparatory steps:
Backup Your Data
As with any hardware upgrade, it's essential to back up all your important data. Although the memory upgrade process is generally safe, there's always a small risk of data loss or system instability.
Power Off the Server
Make sure to power off the server completely and unplug it from the power source. This will prevent any electrical shock and protect the server components from damage.
Ground Yourself
Static electricity can damage sensitive electronic components. Before handling the memory modules, ground yourself by using an anti - static wrist strap or by touching a grounded metal object.


Gather the Necessary Tools
You'll need a Phillips - head screwdriver to open the server case. Make sure you have a clean, well - lit workspace to perform the installation.
Installing the Memory Modules
Now that you're prepared, it's time to install the memory modules. Here's a general step - by - step guide:
Open the Server Case
Use the Phillips - head screwdriver to remove the screws on the side panel of the server case. Slide the panel off to expose the internal components.
Locate the Memory Slots
Refer to the server's documentation to find the memory slots. They are usually located near the processors. The slots are typically color - coded or labeled to indicate the correct installation order.
Remove the Existing Memory Modules (if necessary)
If you're replacing existing memory modules, gently push the retaining clips on either side of the module outward. The module will pop up at an angle. Carefully remove the module from the slot.
Insert the New Memory Modules
Align the notch on the bottom of the memory module with the key in the memory slot. Insert the module into the slot at a 45 - degree angle. Once it's fully inserted, gently press down on the module until the retaining clips snap into place. The module should be flush with the motherboard.
Close the Server Case
Once you've installed all the new memory modules, slide the side panel back onto the server case and secure it with the screws.
Post - Installation Steps
After installing the memory modules, follow these steps to ensure that the upgrade was successful:
Power On the Server
Plug the server back into the power source and power it on. The server will automatically detect the new memory modules during the boot process.
Check the System Information
Once the server has booted up, check the system information to verify that the new memory has been recognized. You can do this by accessing the server's BIOS or by using system management tools such as HP Smart Array Administrator or HP Integrated Lights - Out (iLO).
Run Memory Tests
It's a good idea to run memory tests to check for any errors. You can use built - in memory testing tools in the server's BIOS or third - party memory testing software.
Conclusion
Upgrading the memory of your HP server can significantly improve its performance and help your business run more efficiently. By understanding your server's memory requirements, choosing the right memory modules, and following the proper installation procedures, you can successfully complete the memory upgrade process.
If you have any questions or need assistance with upgrading the memory of your HP server, or if you're interested in purchasing high - quality memory modules for your HP server, feel free to contact us. We're here to help you make the best decisions for your business and ensure that your server operates at its peak performance.
References
- HP Server User Manuals
- HP Server Memory Configurator Tool Documentation
- HP Official Website Resources on Server Memory